Saturday, 30 April 2016

Floors

Didn't plan to change the floor, but there were no floor tiles where the old wooden box was, so didn't have much choice.

So the floor comes up, and the old stinky drain:


I took out a round drain, dug all around the flaky concrete, exposed the waste pipe and stuck an adapter on there. It then fit nicely into my drain housing.

Poured a load of concrete around it, and bob's your uncle.

And yep, I found water pipes buried in the ground concrete. Still on the water mains, pinched shut, and buried.  The bastards. I won't vent my rage here, if you know me, you've heard it already.


0

Friday, 29 April 2016

Making a mess to make it tidy

This post will be all about hiding wires and pipes in the walls.  It's a fascinating topic, I know.

Short story - I bought a pretty powerful electric wall-chaser ("Chasing" is hiding stuff in walls) for 90 quid.  It would have cost 120 quid to hire a professional one with a vacuum, and the lady really recommended the vacuum.  Nah, buy a cheaper one, skip the vacuum.  It worked, but you wouldn't believe the mess it INSTANTLY makes.  Really noise, pretty hard to hold against the wall and move upwards, and instantly covers everything in sight with a huge dust cloud. Great fun.

And I ended up with big grooves in my walls to hide:


  • The pipes for the concealed hand-shower at the end of the room
  • The pipes for the overhead shower up the side of the room, next to the water source pipes
  • The cables from the light switch area up to the ceiling, to conceal light cables, audio cables, and any other electrics.


0

Thursday, 28 April 2016

The felling of the tiles

Kayliegh happened to have a work trip for a week in the US, so I took the opportunity to kick off the project.  The intention was to get all the tiles down while she was gone, and present her with a clean blank canvas on her return.

This didn't happen.

...

I haven't updated the blog for a long time, as you can see. Fair to say I can't be arsed at the moment, but I'll get back to it.

In the meantime, I'll upload photos I'm taking of the project as I go (I only ever meant to share the photos in the first place), with minimal waffling...

So, tiles coming down:


As you can see, the plaster was falling apart as well, so we decided to go back to bare brick. Fantastic.

Spot the old copper pipe buried in the right wall?  Yeah that was fun.  It was shielding two mains cables, one live, one dead, that ran from the ceiling down into a wooden junction plate, that was all buried in the second layer of wall plaster.  After a bit of chopping, cursing, testing, and really fiddly electric work (because I chopped it right at the ceiling, dumbass) turns out it's responsible for the lighting circuit in a completely different room. I'll say that again. It's the connecting cable, from the light switch, to the light, in a completely different room.  You can imagine the words I used.


Take the ceiling down:

Away with the old ceiling, to make way for a shiny new one:

Was surprisingly difficult to get down.  Those side batons were nailed into the wall with 9 inch nails, but the air hammer and a new circular saw made pretty short work of it.  Cables left dangling were just from the light switch to the now-exposed ceiling rose.
0

Wednesday, 27 April 2016

All tooled up

The good thing about air tools, and one of the reasons I was so quick to pick up the air hammer, is that they're cheap. The air hammer was just 30 quid, and it was about the most expensive one. Obviously the catch, as I now know, is that you need a compressor to power them.
So out came Mr. Visa again, and a couple of days later, problem solved.

I have a brand new 2HP compressor, ready to power my wonder-tool.  These bad boys are LOUD, but apparently that's how they're meant to be.  You can get oil-based and oil-less compressors, and the oil-less ones seem more expensive. I didn't see the point, since I won't be using it for long, so went for an oily one. I believe the difference refers only to the engine that squashes the air, so no difference in operation.

The are a few other metrics worth considering, such as CFM, FAD, receiver size, and max pressure. All pretty boring stuff, but needs matching to the tools you intend to connect.

The other thing you'll need, which again, I forgot, is a hose to attach the compressor to the tool.  I do a quick online search, and found a branch of Machinemart locally that had what I needed.  They were really helpful in there, gave me all the "snap connect" fittings I needed to connect everything together. My air hammer can finally spring to life!

While I'm at it, I thought I'd invest in a few more cheap air tools to use through my project.  I get a "Cut-off tool" that looks like a mini angle grinder for 25 quid, and a rotary sander that looks pretty heavy duty, for another 30.  I figure I'm going to need to do some sanding at some point, and the cut-off tool will be useful for chopping bits of wood or pipe or anything else I come across, I can also use it to carve the channels in the wall to bury the pipes and cables...but that's a bit down the line yet.


Enough planning, enough spending, time to get those 5 million teeny tiny stupid tiles off my walls.


0

Tuesday, 5 April 2016

Time for Action....almost


So after we've bought the tiles and all the shower bits, it's time to stop spending and do some work.

The wet room still looks like this:


I love my dad to bits, but I cursed him for every single one of those tiny teeny stupid tiles he once lovingly put up for me.  They're 2cmx2cm each, and there must be about 3 million of them. I knew this wouldn't be fun.

Just looking at the room and evaluating the work made me feel exhausted.  Teeny tiny stupid tiles aside, I need to remove the shower, maybe the towel rail, figure out if the floor is still usable, and take the old grotty ceiling down. Then learn how to put up a new ceiling, re-plumb, re-wire, re-tile, and then figure out this floating ceiling idea that got me all excited in the first place.

That's about all we can see at the moment, let's hope there's not too much more work revealed as we go. (Spoiler alert: there is)


Kayliegh's dad has a sterling piece of advice he's offered on a few occasions: "Get the right tools for the job, and you'll enjoy doing it".  He's almost completely correct; get the right tools, and the job will be slightly more enjoyable.  Let's be honest, no matter what tools you've got, removing 4 million teeny tiny tiles is never going to be fun.  Still, it set me on my pursuit for the right tools, and gives me an excuse to buy more toys.

During my research, I came across this video:


This "Air Hammer" thing looks to be just what I need, the tiles are practically jumping into his waiting arms.  Off I go, buy buy buy, and a shiney new air hammer is winging it's way towards me. Now, there are a lot of different specs to an air hammer, and a lot I didn't understand or pay attention to.  Things like Average Air Consumption, operating pressures, and strokes per min, which to me, all sound like bigger-is-better numbers. In my experience, the 2nd or 3rd cheapest options are normally the best shout, so that's what I buy.

I should have researched more.


My wonder-tool arrives, and I'm ready to get cracking on these tiles, when I realise my mistake. It's an AIR hammer.  The operative word being AIR.  This fantastic labour-saving tile-destroying tool of hope, has but one connection on it - for a pneumatic air hose. After a frantic minute of Googling my suspicions of failure are confirmed.  I don't have a spare pneumatic air hose lying around the house, and I certainly don't have the recommended minimum 2HP compressor and 25 litre receiver to power this amazing tool.

Balls.  Back to Amazon I go....


0

Monday, 4 April 2016

Tiles.

Tiles don't do anything, or add any functionality to the room, and cost a shit-ton of money.  Choosing tiles, just like choosing clothes, means choosing what I think is nice looking, and I could spend 17 lifetimes doing that, just to ultimately pick something that everybody else in the world thinks looks shit.  So I do the manly thing, and defer to a woman.

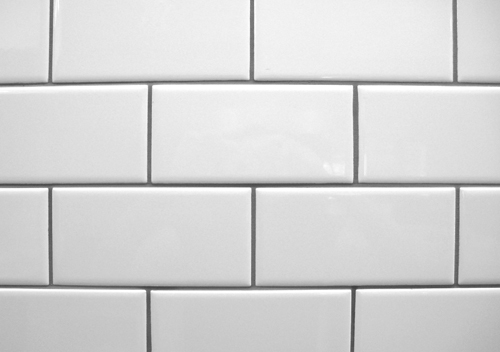
After a bit of research, Kayliegh had a few ideas, one of which was the subway style tiles.  These look perfectly acceptable I thought, glossy white with black or dark grout, would look good with my black stone stuff.

I had measured the room to the millimetre. It was surprisingly complicated for such a small room, with the ledge and windowsill and round the door, it took a lot longer than I expected.  It came out at 13.39 square metres.


Our tile shop of choice was Dunkley Tiles, primarily because Kaylieghs dad has a 20% discount trade card, and it's local.


Once we got into Dunkley's, had a bit of a wander, we found the subway tiles at £16.99 / sq.m. came in at around £230.  Pretty good value, if not an insignificant sum.

That would be too easy though.


While walking around the tile shop we noticed a shower cubicle with a wood effect tile planks with graffiti all over them.  It looked massively different, and appealing, almost making the walls into artwork.

The only nagging thing, was that with such a small narrow room, the graffiti effect would be over-bearing.  The room measures just 700mm wider, by 1930mm long, so it risked turning it into a wooden box with a bit or writing on it.

We kept looking, and found a similar effect tile, but lighter, less wooden, and without the graffiti. Urban Wood Vanilla Natural- It's a ceramic tile, 1cm thick, in a light white finish, with some cool blue and brown discolourations that made it more interesting that your usual wall tile.  Nice and big as well, so fewer of them to put up (at this point I'm dreading the thousands of 1cm tiles I'm due to take down pretty soon).  I'm sold.

I think these are meant as floor tiles, and we notice them with a gloss finish in the tile shop floor.  The gloss finish is a bit much, and the ones that caught our eye were the matte finish.  The shop assistant, whilst obviously knowledgeable and friendly, has a pretty transparent sales-orientated focus, and initially tries to push us the gloss finish version.

We sit down, and get out my meticulous diagrams and measurements, and declare our requirement of 13.39 square metres.  She takes my diagrams and gives me all sorts of funny looks, like they're indecipherable nonsense or something. After turning them round several times, she asks for confirmation that the obvious wall is in fact the wall and the floor the floor.  I confirm without a hint of sarcasm in my tone, and she proceeds to knock together her version of the measurements.  Completely disregarding the window, the sill, the ledge, and the soon-to-be box, our helpful assistant just takes away a door space, from 4 wall spaces, and says "Fourteen" in a commanding voice.  Well look at that, she's pretty much bang on.

"So 14 Sq.m. of the gloss tile", she says as she taps away at her calculator, "is about £909".  I almost fell off my chair. The woman must be fucking delusional.  "No, the MATTE" I said, and she tappy tap tapped away again as I look at Kayliegh with absolute shock at the extortion she was trying to pull, and the price came down to £489.  She said it was a "special" because it was end of stock, and nobody wants the matte, and we're lucky it's such a small amount we need, so it's half price.  We didn't play our trade card just yet, partly because we didn't have it with us, and partly to see if we could get another discount first. Pfft. That didn't bloody happen, we didn't even get the trade discount in the end.

Long story short, and a lot of ranting deleted, it wasn't a "special", it's always available, and it's always available at that price. We ordered it at the beginning of march, with a 3 week delivery estimate, and now being told they're manufacturing it next month, May.  Bloody jokers.  Still the choice has been made and monies paid.

Lesson of the day - Nice tiles are expensive folks.

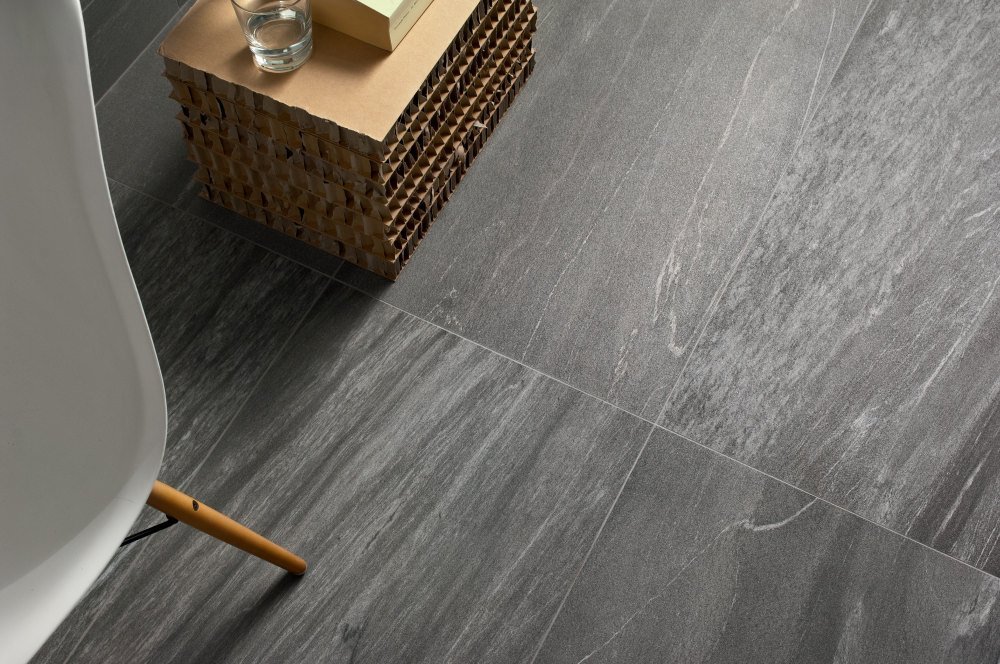
Floor tiles - didn't originally think we'd need them, and we could continue using the current floor.  It turned out that we couldn't, so we got these big Valmalenco Nero floor tiles:

They should contrast nicely with the light wall tiles and compliment the black surfaces. and they're 900mm long and 450mm wide, which means I only need 6, which cost about £150, and just chop them all one side, and lay them straight up. Easy street.


0

Wednesday, 16 March 2016

Shower unit and fittings

That's enough planning for now, I'm sure I'll be able to figure out the details as I go.  What I really need to do, to get started, is spend some money.  Luckily this is something I'm pretty damn good at.

However I do this, I need a shower unit that will allow me to extend the shower head further than usual, and bury the pipes in the wall. What I really wanted, is just the workings of a shower unit, without the fittings, and then I could plug fittings onto the end of whatever I cobble together.  After a very brief search, it's obvious that a "digital" shower is what I want, so I can position the controls remotely from the plumbing, giving more flexibility.  These also come in pump / controller only format, so I could choose my fittings to go with it. I pretty quickly settled on the Mira Platinum Dual:

It's a nice looking unit, that has two outputs (one for head, one for hand shower), and has some nice features such as a "warm-up program" and timers, and some other cool stuff I can't remember right now. I figured the pump bit would go in the what-was-wooden box, which I'll rebuild somehow in a better way, that won't rot or decay. Figure that out later.

At £400 for the controller and pump, it's not cheap, but not prohibitively expensive, and should be decent quality with warranty etc. I'm no shower expert, but I've heard of Mira, so I'm saying that's a good thing, and a trustworthy brand.


During my search, I did find one preferable option that's worth mentioning.  The RainBrain, by Hansgrohe. This is an awesome unit that controls everything from showers (yes, plural, up to five), to music and lights. It has a super-cool touchscreen interface, and can spray water at you from several different directions, with different programmes, and flow rates, and all sorts.  It probably makes tea, cleans the house, and sucks you off as well, it's just THAT good.

Unfortunately, at almost £5k, it's just a hair's breadth outside my price range.

So with the Mira Platinum Dual in my shopping basket, now all I need is a big ass shower head, and a hand shower to plug on the ends.  There are thousands of shower heads out there, I shan't bore you with my research, I needed it to be big, and that was about the only requirement. I figured square would probably be easier to embed in a ceiling, however I do it.  I found this one:
There were lots that looked similar in the Google shopping search results, but I didn't pay much attention when I found this, it looked about right. Stainless steel, square, 400mm wide, and it looked nice enough that however it ends up in the ceiling, it'll look fine concealed or visible. I found it on www.bathempire.com, which now seems to be soak.com, for £90.  Pretty decent price I thought, so I bagged it.

n.b. If you're reading this doing your own research, don't run off to Bath Empire just yet. Read on, fellow wet-room enthusiast.

Just the hand-shower bit of the puzzle left now then.  Now how do I want that to look?  And where will I position it?  I want to continue the clean, minimalist look, and conceal it if I can.  But where?

If you paid attention to the previous photo of my wet room, or you know my wet room, you'll know there's a ledge at the end, about 6 inches lower than the window sill, just over 6 inches deep. It's solid, all the way down, and seems to be there just for the sake of being there.  If I'm going to the trouble of burying pipes in the wall for the head shower, it's not much of a leap to bury the hand shower pipes in this lump of whatever-it-is at the end of the room.

There we go, that's the plan.  Big head shower in the floating ceiling of light, and hand shower on the end of the usual chrome tubing stuff, but with the tubing stuff extending out of, and retracting back into, the solid ledge thing.

Quick bit of research, it turns out that what I want is called a "Deck-mounted" shower.  Makes sense, mounted on the deck, seem to usually be mounted on the end of a bath.  I settle on this simple, minimalist, stainless steel version:


I got it from www.ukbathroomstore.co.uk for £34. Bargain.  I thought the stainless steel will look nice if it's mounted on a hefty lump of black marble or stone of some sort.

So that's now in the plan then, hefty black stone tops for the ledge with the hand shower coming out, and while I'm at it, the windowsill as well to match.


So that's that, all the equipment bits for a new shower room, for 524 quid.  Not cheap, no, but not extravagant, and it's all good quality stuff that should last.  So I'm chuffed at my purchases.  They've all since arrived, and I'm still chuffed.  The shower controls are slightly deeper than I expected, and the outside ring rotates to control the shower pressure.  This makes it feel a little less solid in your hand, but that might be because it's not mounted on the wall yet. I'm sure once it's up it'll be great.  It's got a nice bright blue backlit display as well, mounted in gloss black. I like it.
The hand shower and head shower are just as expected. Heavy feeling quality stainless steel, just as pictured.

Next job, choosing tiles.  My least favourite thing....choosing what looks nice...
0

Monday, 7 March 2016

The Plan

I've always liked suspended ceilings; the sort that is seemingly floating in space, with light beaming out around it, not the square tile sort of dirty white cork you find in most schools and offices.

The sort that looks like this:


Don't they look nice? Sleek, modern, stylish, and a light source.

So I begin pondering how it might look in my small wet room. It was immediately obvious that the *only* sensible course of action, would be to conceal a big ass shower head in there. Could I do that? Should be possible, right? Hide some pipes, some wires, why not?

Think about it - a clean, sleek, floating platform with bright light beaming out the top, and a torrent of water pouring out below. Obviously I'd pop my waterproof speakers back up there and wire them up somehow.

Light, music, and water, all out of the ceiling.

Sold. Absolutely 100% unequivocally S - O - L - D.

It just has to be done, and there's no turning back now.

0

Tuesday, 1 March 2016

So it begins...

The wet room in my flat needed some pretty serious attention. The once pristine white tiles had become yellowish and grotty, the drain had an aromatic hairy slime under the cover, and the wooden tiled box that concealed the plumbing had rotted and collapsed, revealing a  pretty healthy plant root system coming through my walls.  It was unusable.


The photo really doesn't show the extent of the grime. On the bottom right you can just about see the bin bags and duct tape over the collapsed wooden box, which probably created a nice humid bio-dome type environment for the invading plant life to flourish.

The ceiling was Artex covered plasterboard nailed onto wooden battens, in a once-white-now-yellow emlusion paint. A pane of frosted paisley glass rested in a framed hole with a standard ceiling rose behind it.  You can see one of the small speakers I had previously installed, which had cables running through the wall to a phono socket in the hallway outside.

I had fitted the shower myself a few years before, and just hung on some screws in the wall.  The 22mm pipes came out of the wall and into flexi-pipe compression fittings, into the shower.

Lastly, the chrome towel rail, standard 15mm copper pipes go round the room and through to the bedroom to the left, with two T-junctions going through the the bathroom next door, to the right

So, it's time to refurbish.....what to do what to do....
0